One of my favorite photography techniques is long exposure during daytime. A scene may look totally different depending on the exposure time. All moving elements will be blurred in a long exposure. In landscape photography this especially applies to water and elements affected by wind, such as clouds.
The following two images are examples of the same scene captured with exposures of 44 s (above) and 1/20 s (below).
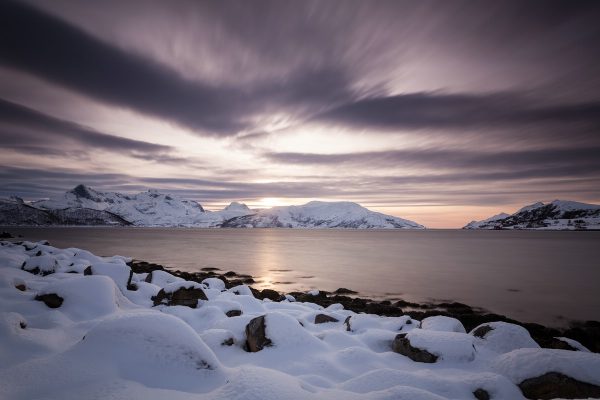
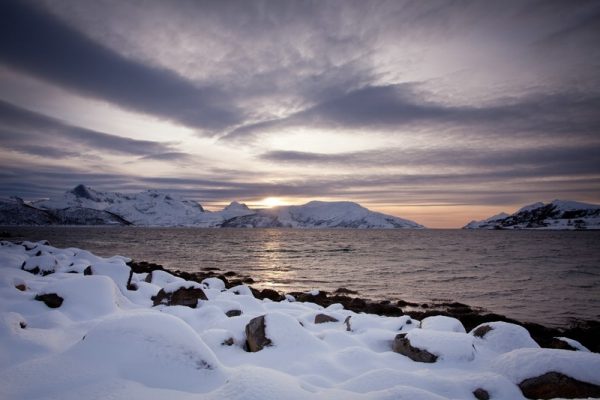
Disregarding the slightly different colors caused by the application of optical filters, there are major differences in the rendering of the water and the clouds. While in the short exposure small waves can be seen, in the long exposure they are evened out and the water surface seems almost perfectly calm. In contrast to the water, the clouds gained in dynamics as their movement now becomes apparent.
Another example:
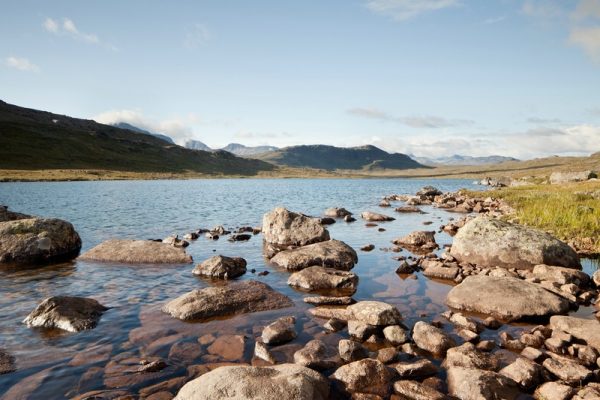
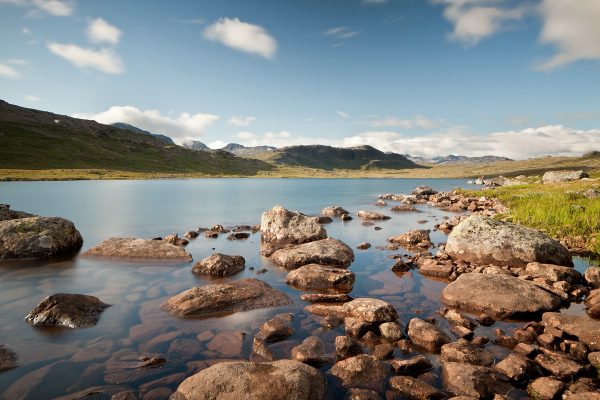
1/13 s vs. 30 s (here the addition of a polarizer filter in the bottom image increased contrast in the sky; this is no effect of the long exposure)
What is the Right Exposure Time?
Whether a long or a short exposure is better for a given scene is a matter of personal preference. In my opinion, it is best to experiment with different times and then review the results later. If you want to use a long exposure to blur water, longer is not always better. You should be especially careful if you encounter fast-flowing streams, waterfalls, or ocean waves where exposing too long may affect the scene negatively in losing too much detail. In these cases you should try different exposure times but generally prefer shorter exposures (unless you want the water to appear as white fog without structure).
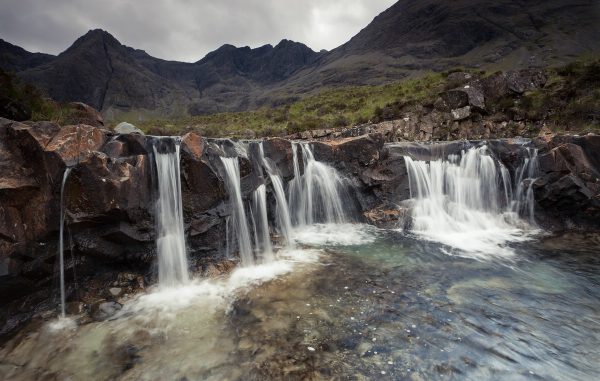
For the picture above an exposure of 1/8 s was used to blur the water enough to convey its dynamics but still retain most of its structure.
Practical Aspects
You may ask yourself: How can I achieve an exposure of, e.g., 30 seconds in bright daylight? The solution is the use of Neutral Density Filters (ND-Filters) that absorb most of the light before it enters your lens.
Personally, I use filters with light reduction factors of 64x (6 f-stops) and 1000x (10 f-stops). The 1000x version can be used to achieve very long exposures also in bright daylight. The 64x filter is appropriate when there is either less light (e.g., cloudy/overcast sky), you need shorter times, or when you want to add a polarizer which absorbs about two f-stops.
When on location, you mount your camera on a tripod, frame your picture (optionally adding a polarizer and adjusting it), and only then add the ND-Filter as your viewfinder will become almost black when using high densities. Live View will alleviate this problem a bit, but in my experience 1000x ND-Filters are still too dark for Live View to be useable. Many ND-Filters will create a color cast in your picture. This, however, can be easily corrected by adjusting the white balance.